By default, Mac OS X come with preinstalled Apache and PHP. But for a while, i’m using XAMPP for Mac in my macbook because in my first time using Mac OS, i don’t know about it.
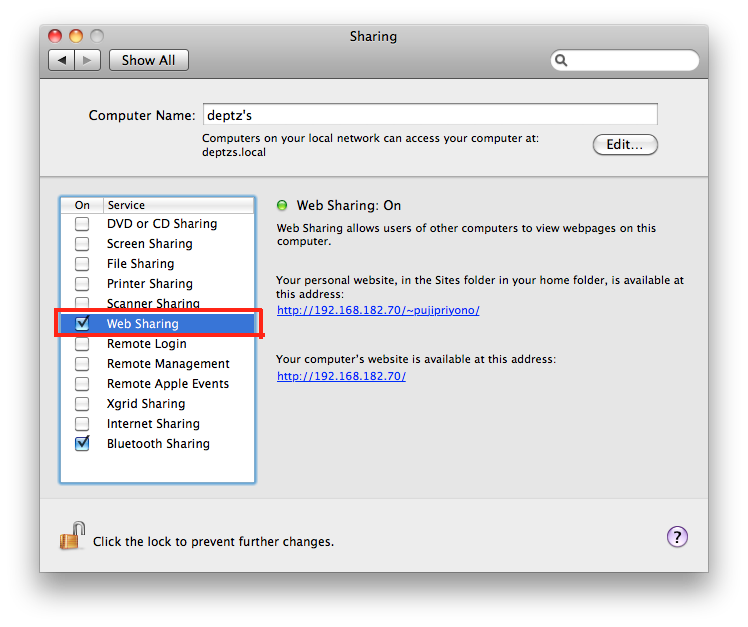
Yesterday, i tried to using preinstalled Apache and PHP, also adding MySQL. For enable Apache, it just take a click. Go to System Preferences -> Sharing
Done! 🙂
For enable PHP, use your favorite text editor, and edit file /etc/apache2/httpd.conf
- Here I’m using TextWrangler. Open Terminal, and type:
sudo open -a TextWrangler /etc/apache2/httpd.conf
- Then remove # in the front of
LoadModule php5_module libexec/apache2/libphp5.so
- copy default php.ini configuration with this command:
cp /private/etc/php.ini.default /private/etc/php.ini - Edit timezone setting to your correct timezone
date.timezone =
- Then just disable and then enable Web Sharing. Done! 🙂
- For test your installation, just create a new file named info.php and save it into <your username>/Sites/
<?php phpinfo(); ?>
- And open your browser, go to http://localhost/~<your username>/info.php, for example in my user (pujipriyono) http://localhost/~pujipriyono/info.php
Installing MySQL need more click and edit. But it is easy. 🙂
- Download MySQL Installer from here
- Install everything in the package in this order: mysql, the startup item, the preference pane.
- In
/etc/php.ini, replace the three occurences of/var/mysql/mysql.sockby/tmp/mysql.sockpdo_mysql.default_socket=/tmp/mysql.sock mysql.default_socket = /tmp/mysql.sock mysqli.default_socket = /tmp/mysql.sock
- Then disable Web Sharing, enable it again and start MySQL in the preference pane. Done 🙂
Reference: maestric.com


nice info
Pingback: deptz personal blog » Blog Archive » Enable Mod Rewrite on Snow Leopard
Pingback: deptz personal blog » Blog Archive » Konfigurasi Apache, PHP dan MySQL di OS X 10.8 Mountain Lion
Pingback: Update OS X: Maverick - deptz personal blog